
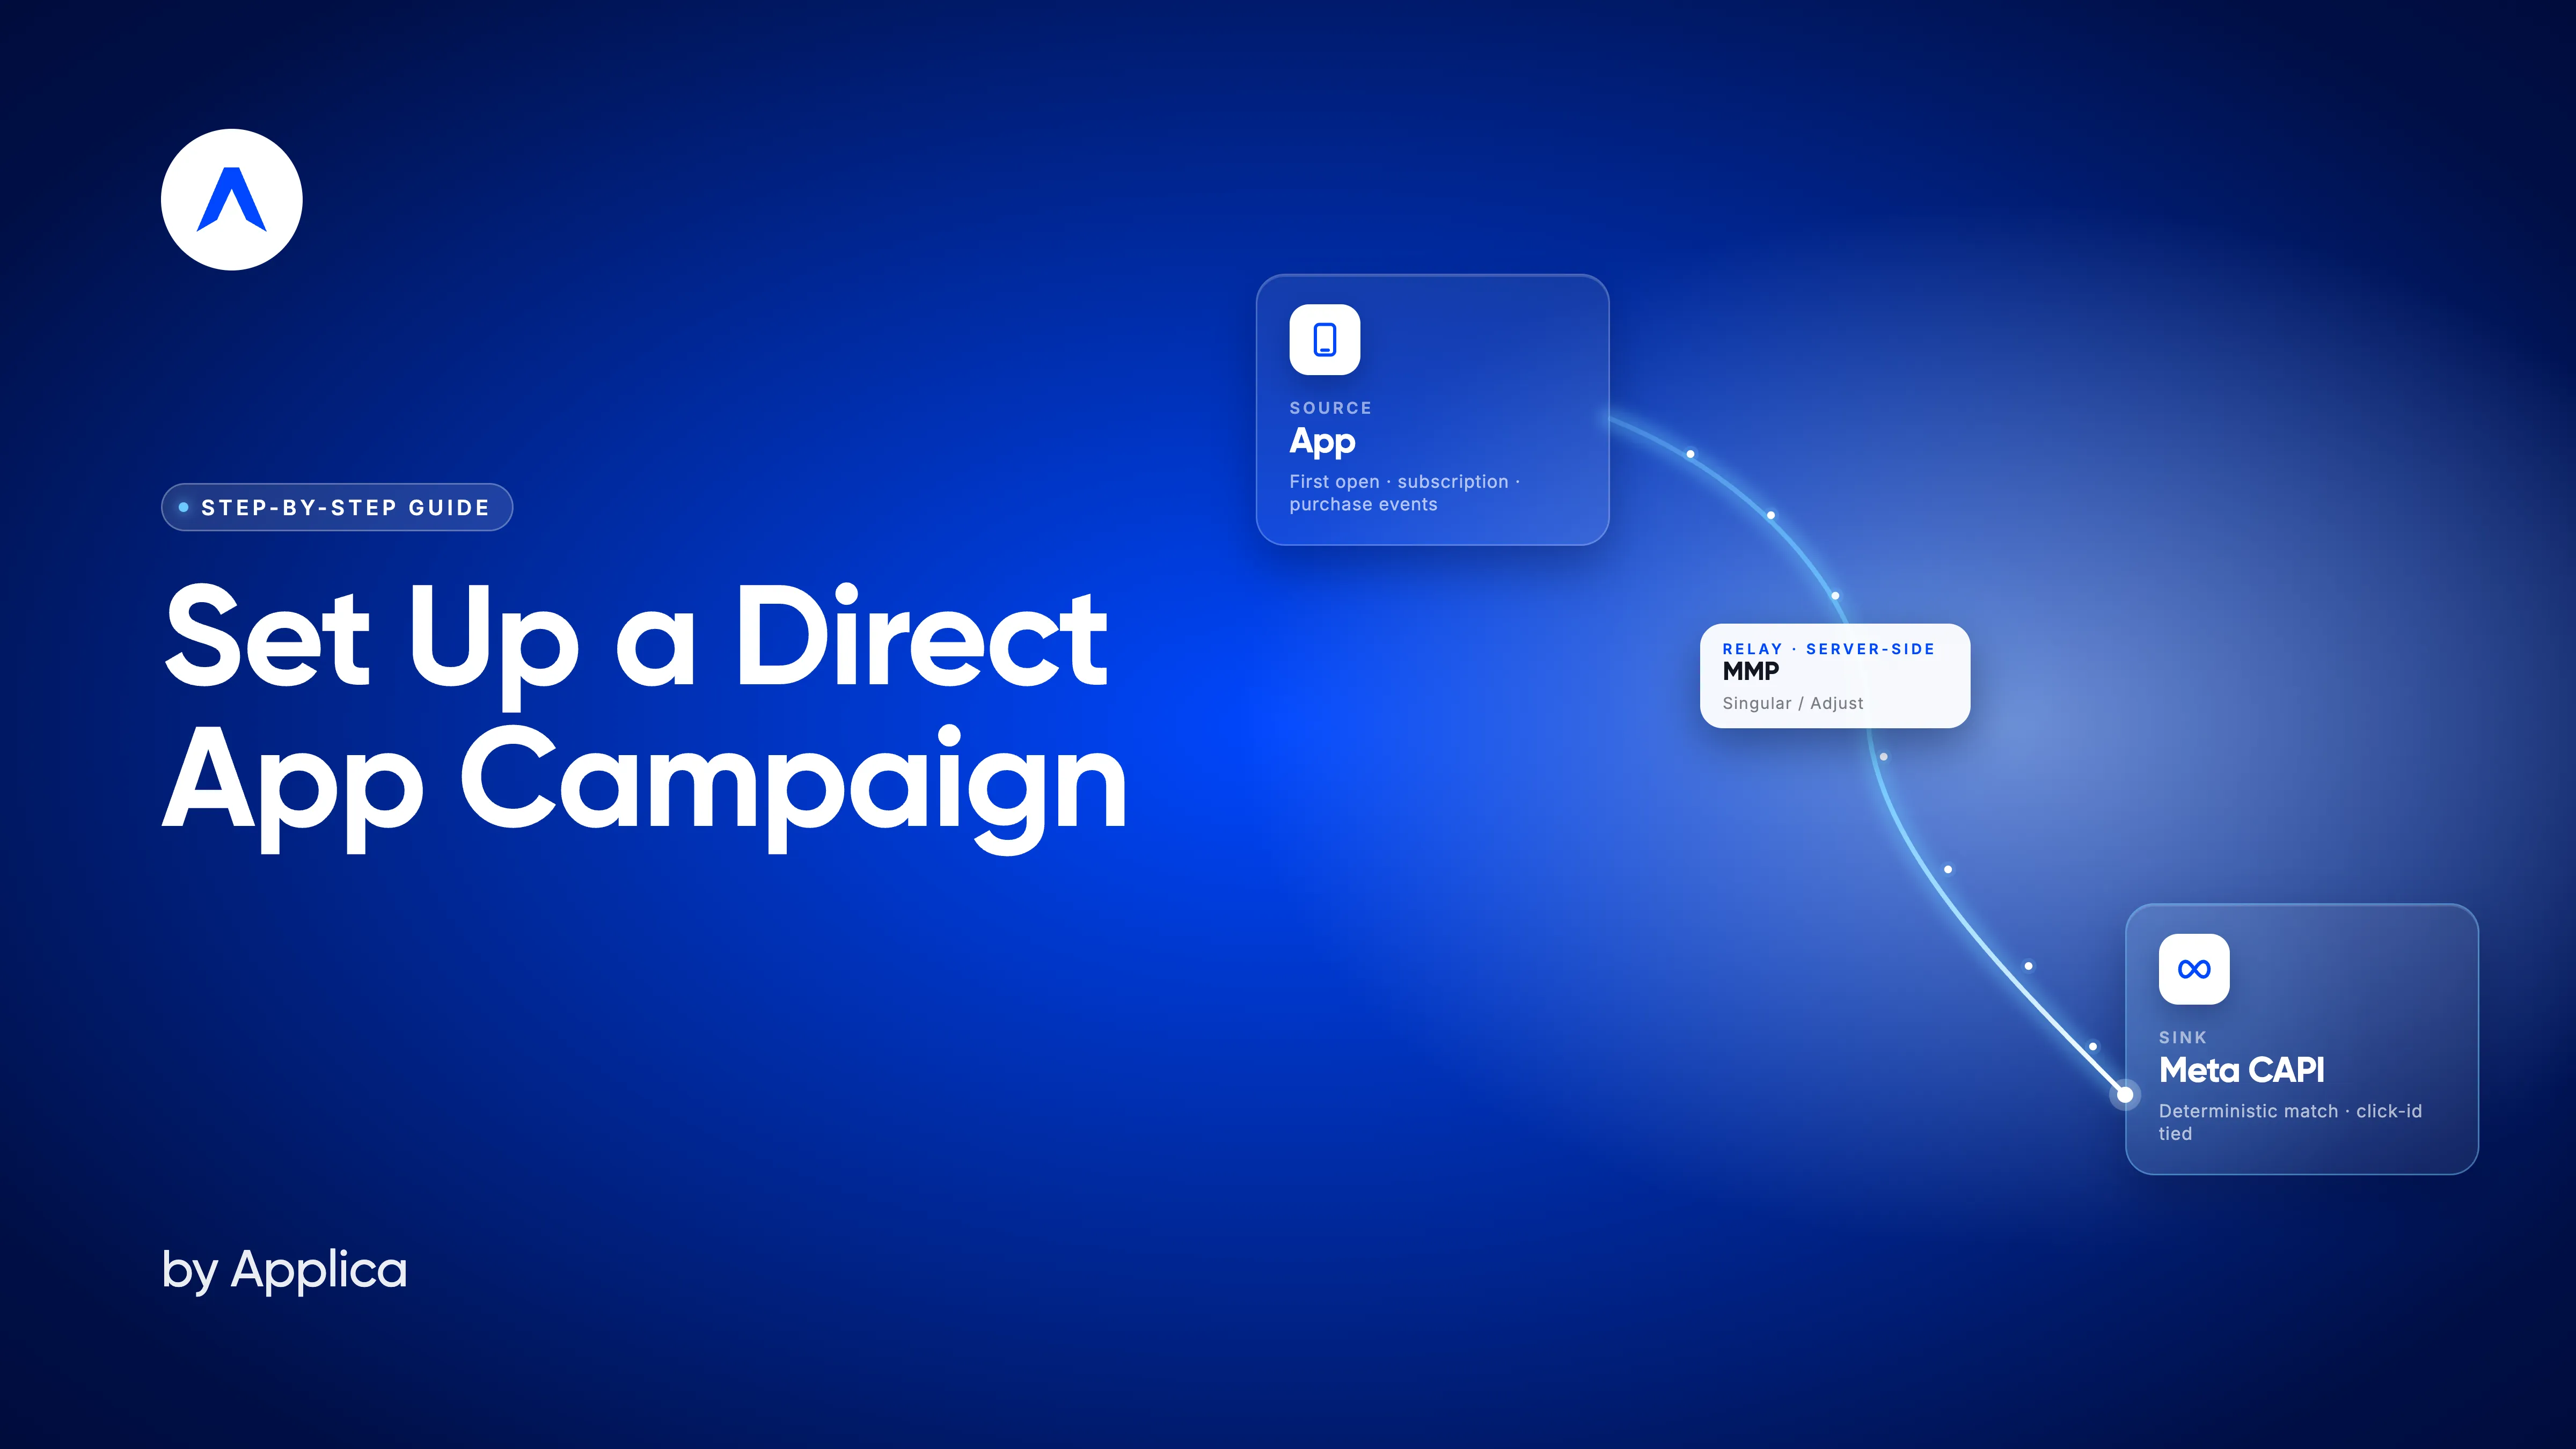
Outcome: A live W2A campaign in Meta, with events flowing server-side through Singular or Adjust into your Web Dataset.
Part 1 — Meta Setup
Step 1 — Create a New Web Dataset
Go to Meta Events Manager to create a new Web Dataset.
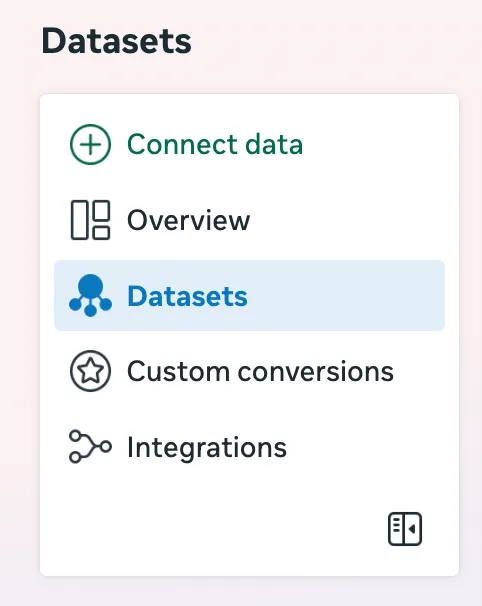
1. In Datasets, click Connect data.
2. In the Connect a new data source dialog, select Web.
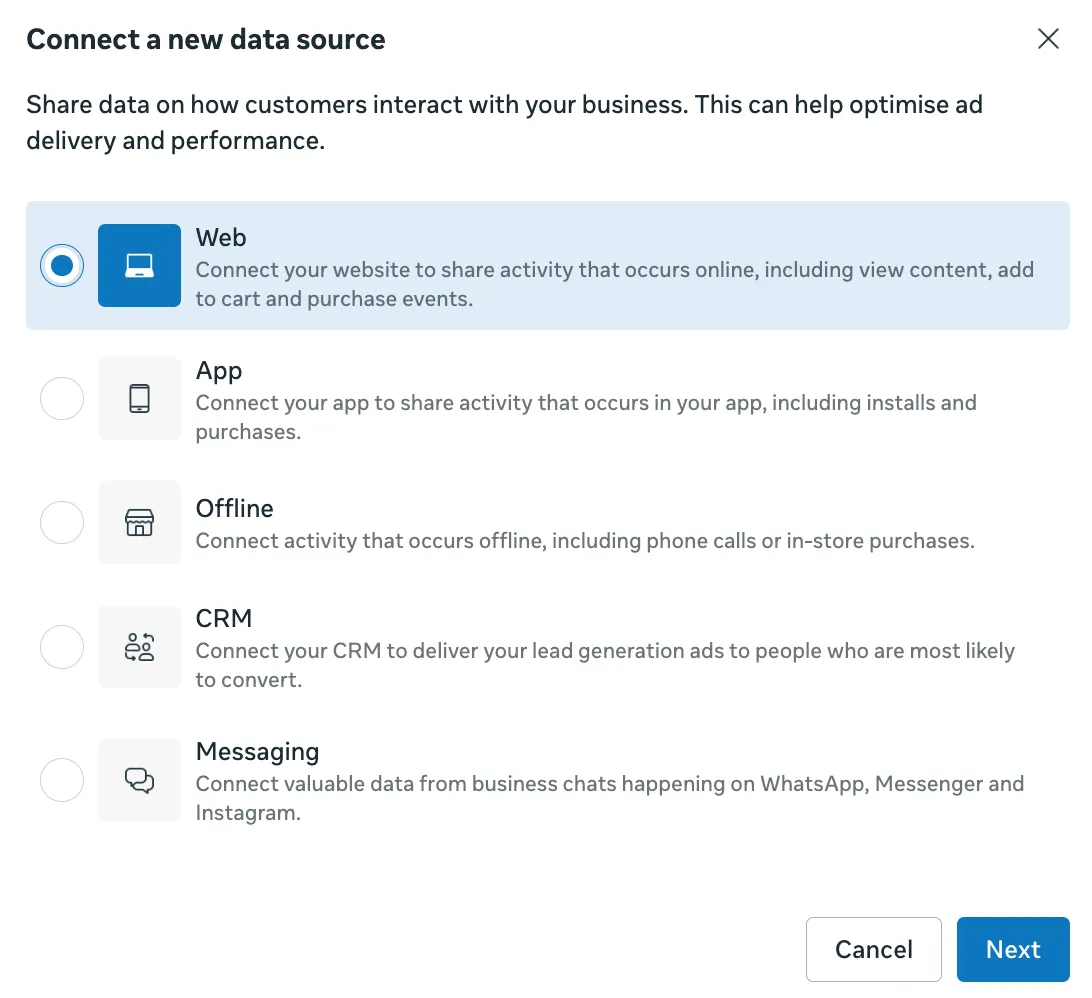
3. Click Next.
4. On the next screen, locate Send events from a server and click Set up Conversions API.
Fill in the form to unlock the rest of this guide
Step 2 — Choose Manual Setup
Meta will recommend a few options. Pick the manual route since we're integrating through Singular.
1. Under Recommended setup, click See less to expand the full list.
2. Select Set up manually.
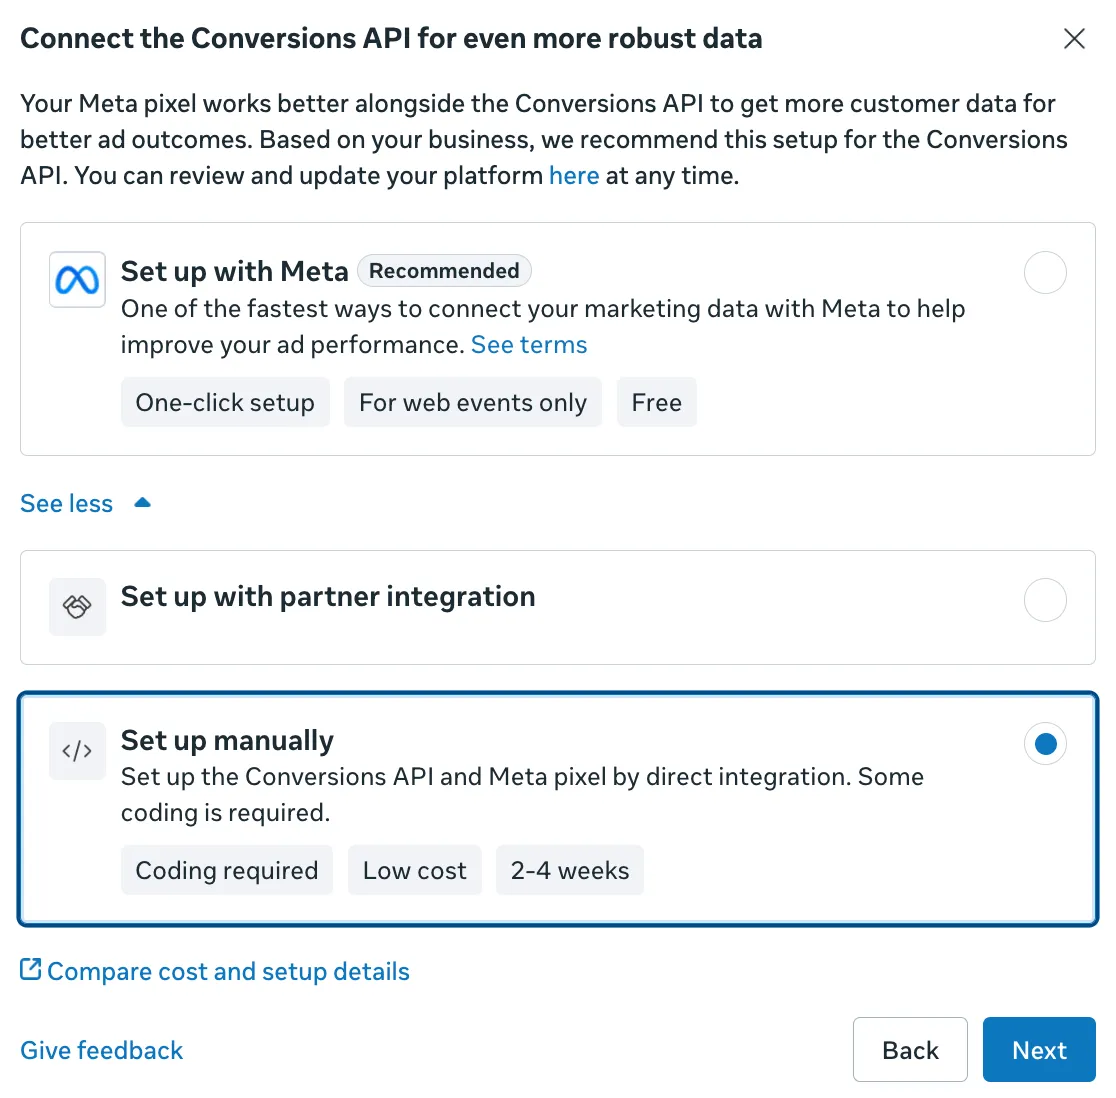
3. Click Next.
4. On How do you want to connect your website?, select Conversions API and Meta Pixel (recommended).
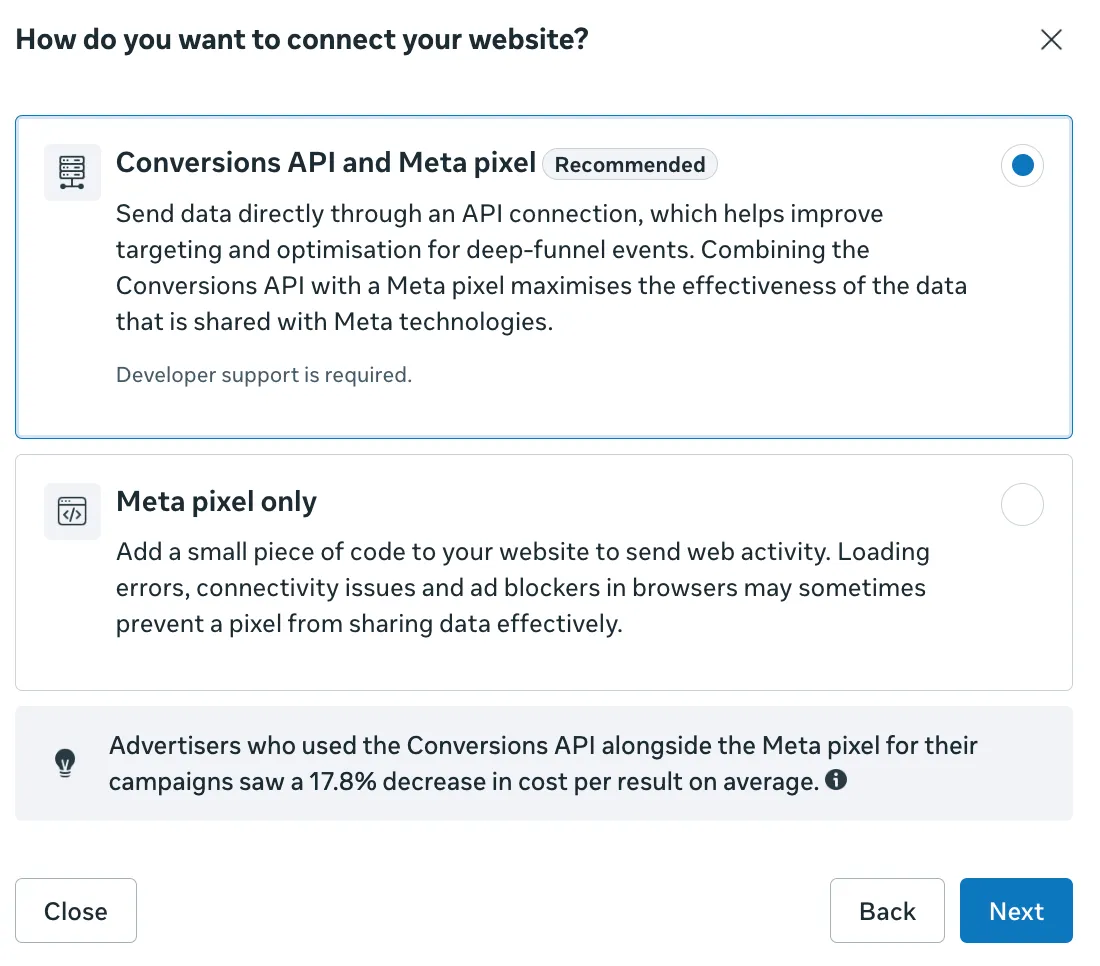
5. Click Next.
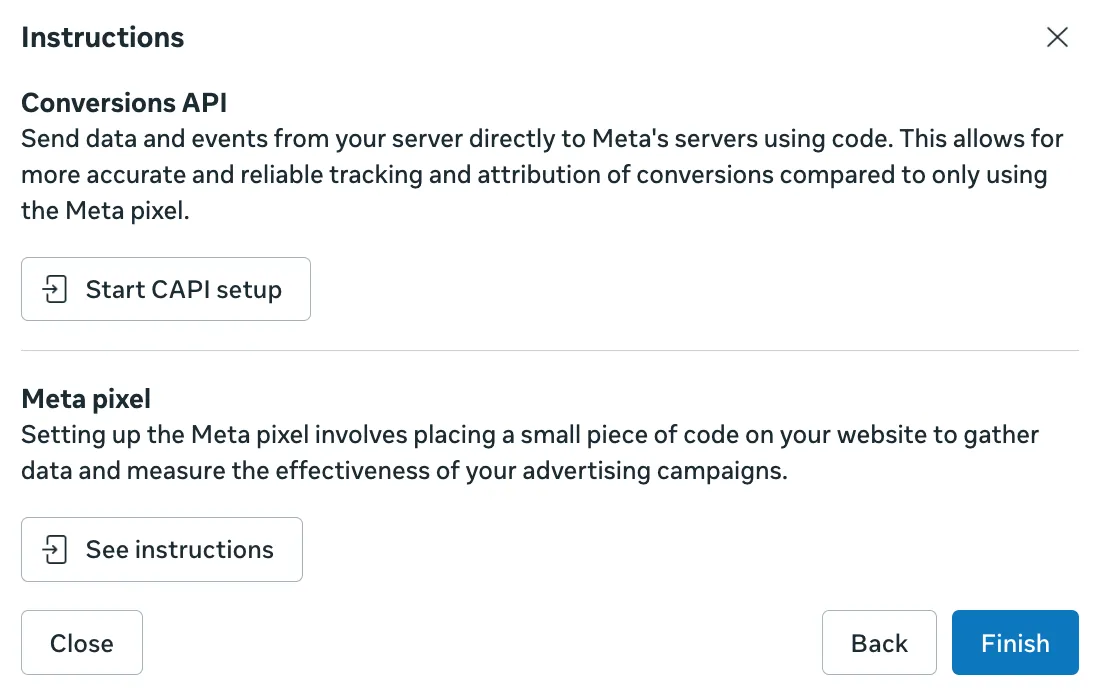
6. On the Instructions screen, under Conversions API, click Start CAPI setup.
Step 3 — Select Events and Parameters
Define which events and parameters to send through CAPI.
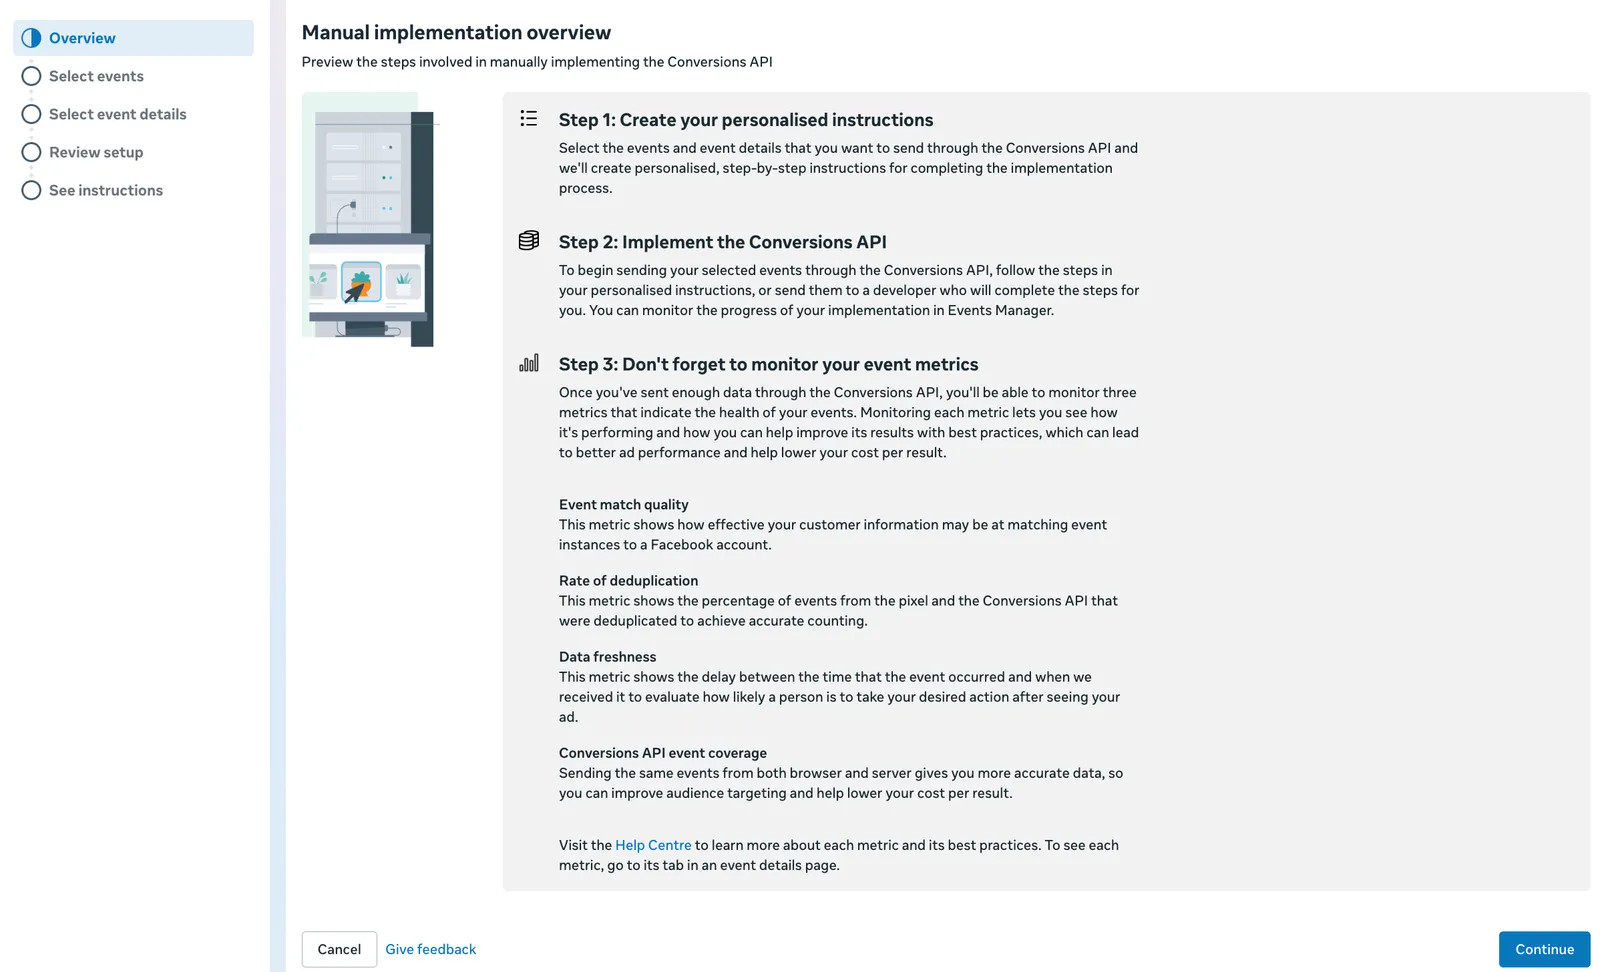
1. On the Manual Implementation Overview screen, click Continue.
2. On Select Events, tick the in-app actions that matter to your funnel and that you'll want Meta to optimise toward — typical picks include Add to Cart, Initiate Checkout, Purchase, and Start Trial.
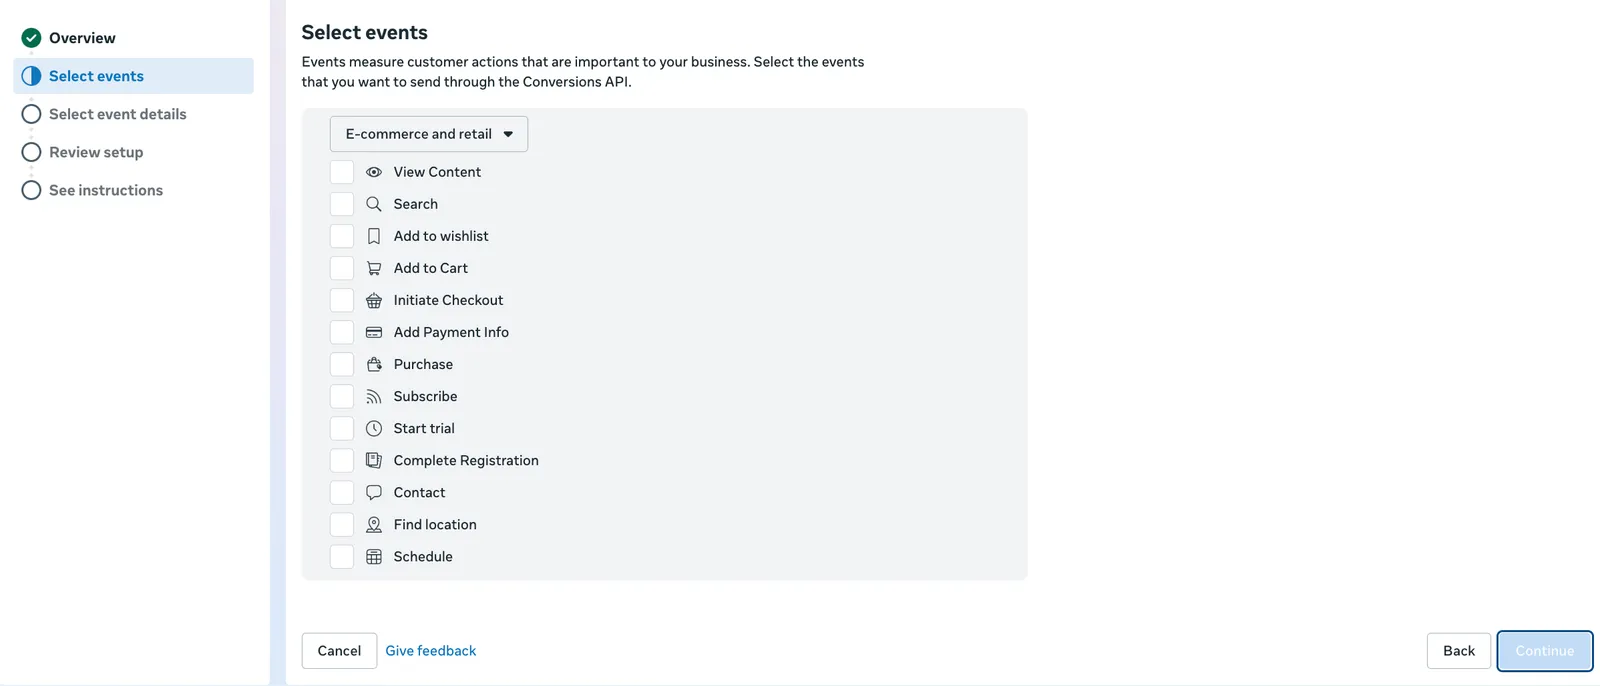
3. Click Continue.
4. On Select Parameters, configure the Event Detail Parameters and Customer Information Parameters for each event.
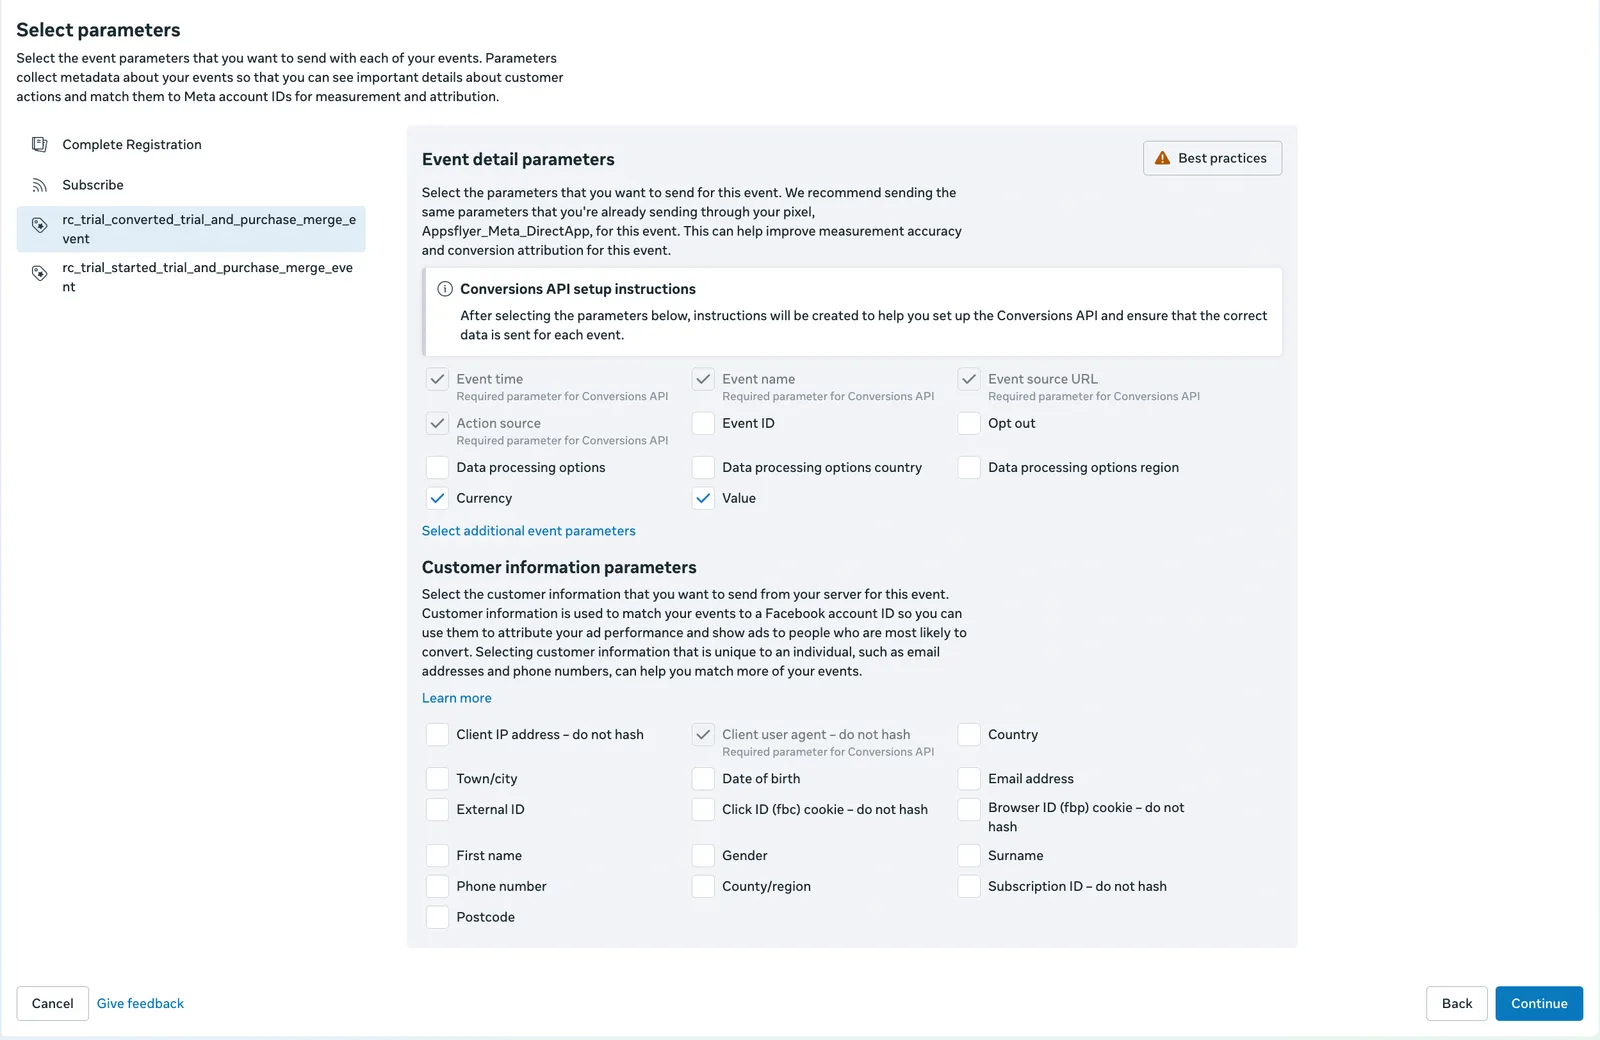
Best practice: Stick with Meta's default Best Practices selections in most cases. Only deviate if your vertical (health, finance, kids' apps, etc.) has data-handling rules that require sending less.
Step 4 — Review Setup and Skip Manual Implementation
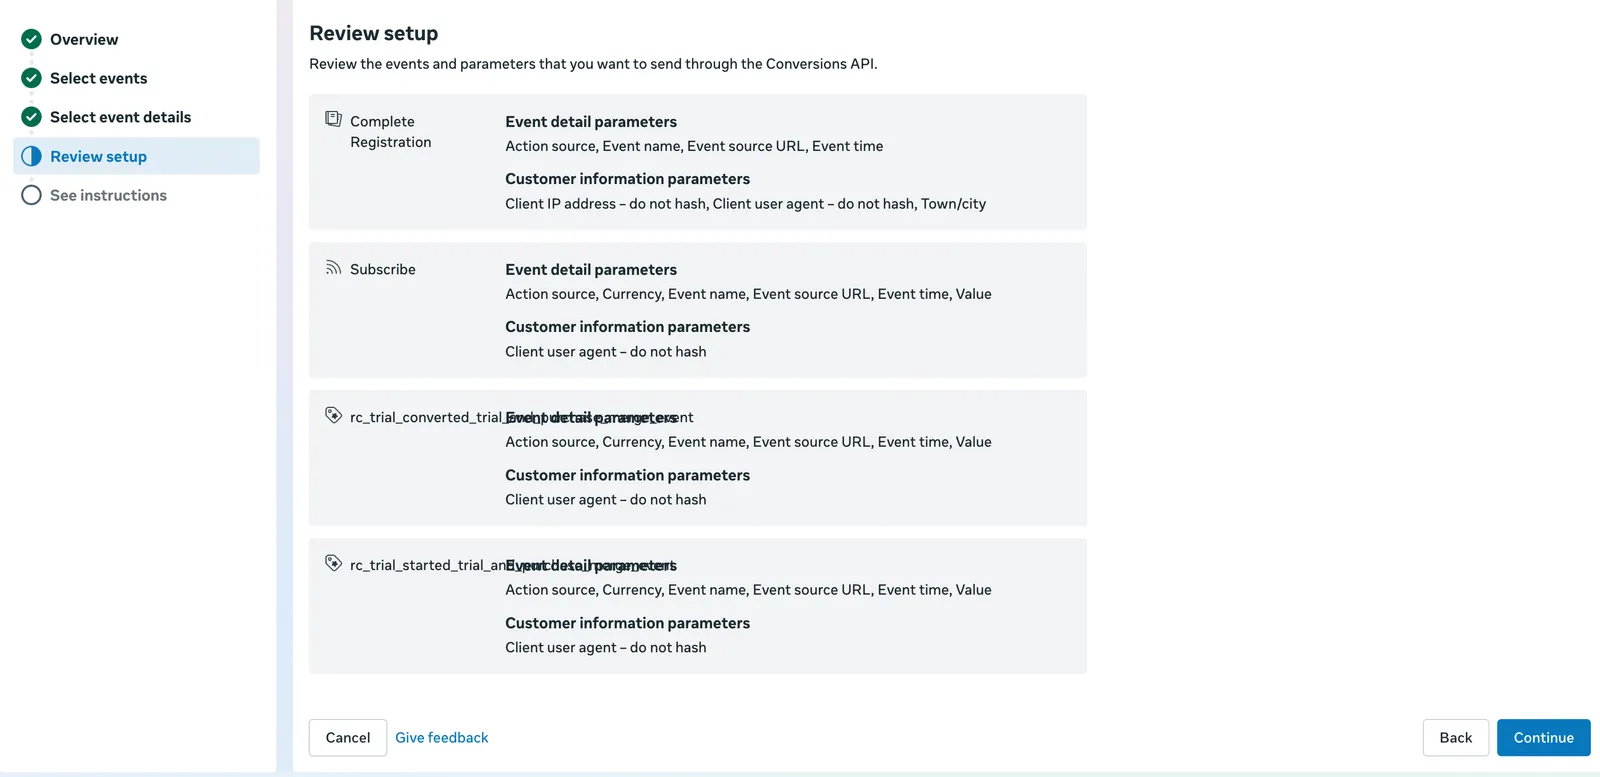
1. On Review Setup, confirm your event and parameter selections look correct.
2. Click Continue to reach See instructions.
Important: Skip the manual code implementation — your MMP is doing this work for you. Singular (or Adjust) sits between your app and Meta's servers, forwarding the events server-side. There's no SDK or pixel snippet to install at this stage.
3. Click Continue to proceed to the Using the Conversions API screen.
Step 5 — Generate Access Token
This is where you grab the credentials Singular or Adjust needs.
1. On the Generate an Access Token section, select Set up with Dataset Quality API (recommended).
2. Click Generate access token.
3. In the Select datasets to set up direct integration with Quality API dialog, choose the dataset you just created.
4. Click Generate access token again to confirm.
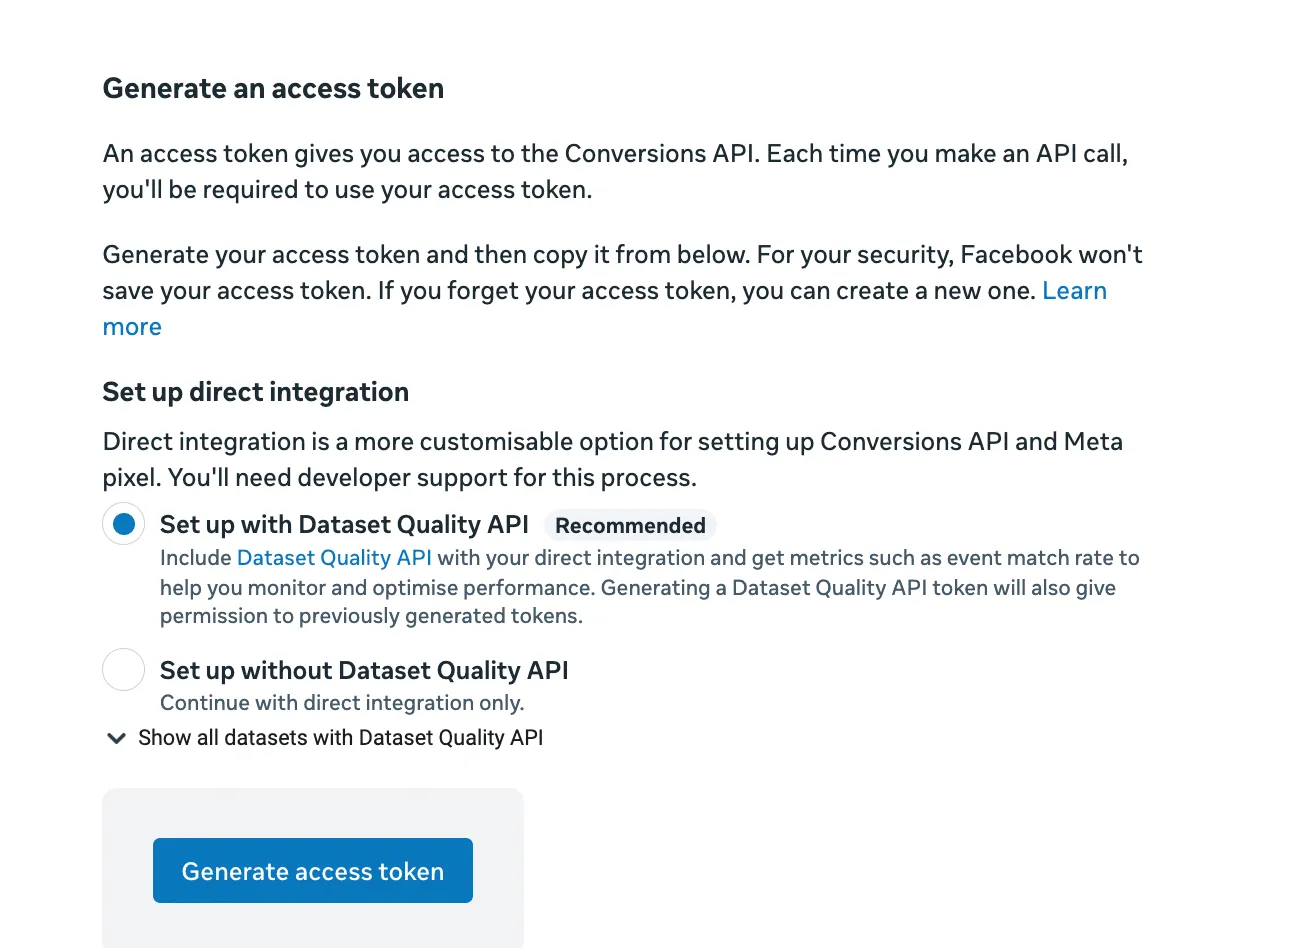
Heads-up: Once a dataset is configured for direct integration with Quality API, opt-out is not currently available. Make sure you're using the right dataset.
You'll now need two values to plug into your MMP:
| Credential | Where to find it |
|---|---|
| Dataset ID | Dataset → Dataset name → Settings |
| Access Token | Dataset → Dataset name → Settings |
Part 2A — Singular MMP Setup
Step 6 — Add Facebook Web Partner Configuration in Singular
Now connect the Meta Dataset to Singular so the MMP can forward in-app events server-side.
1. Go to Singular → Attribution → Partner Configuration.
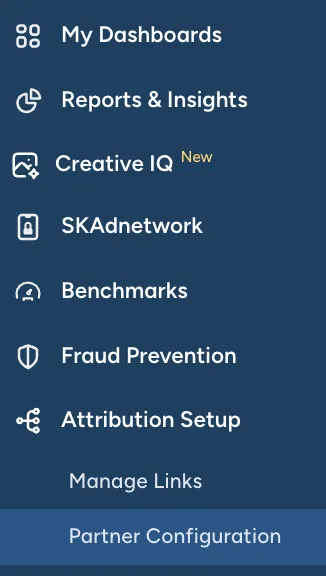
2. Click Add a Partner, type and choose Facebook Web.
3. In the dialog, choose your App and App site (platform) to configure. Mobile, PC, and console apps are supported.
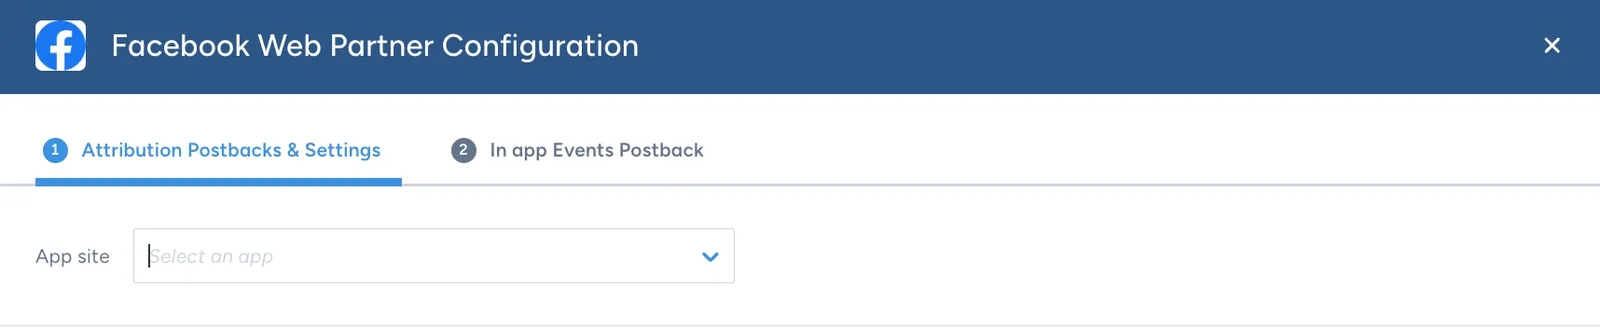
4. Paste your Access Token and Dataset ID (from Step 5) into the Meta Event Manager fields.

5. (Optional) Configure additional events to send to Meta and map them to a Meta Event Name under Event Postbacks (e.g. in-app purchase → Meta Purchase).
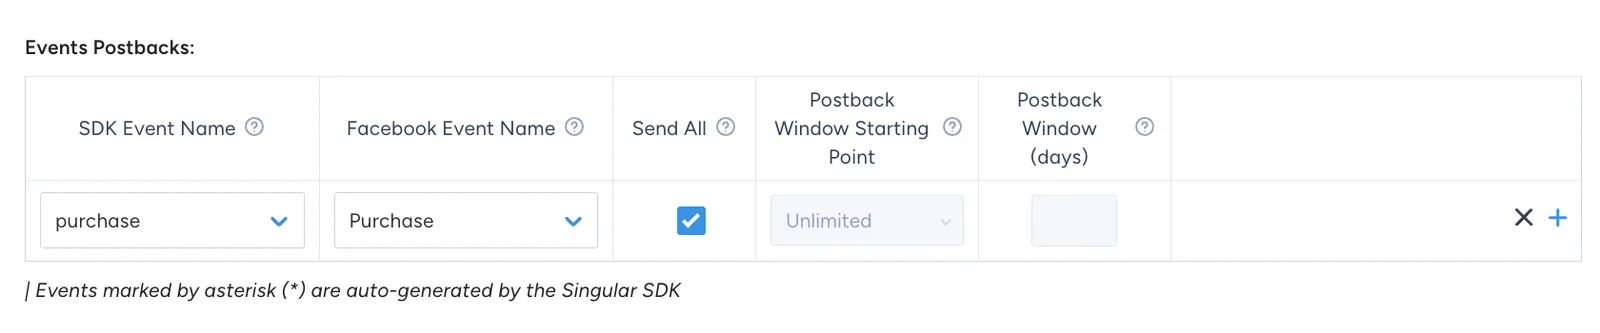
6. Click Save.
Note: "Facebook Web" may not be enabled on your Singular account by default. If it's missing from the partner list, reach out to your Singular CSM to have it switched on.
Step 7 — Create Singular Link for Facebook Web
Generate the tracking link you'll paste into the Meta ad.
1. Go to Singular → Attribution → Manage Links.
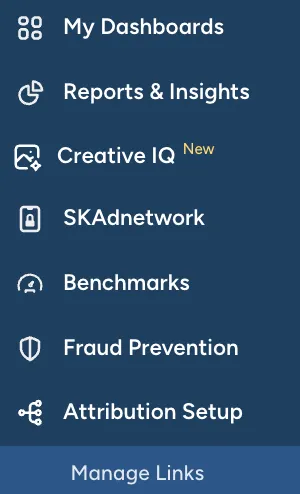
2. Select your mobile app from the list on the left.
3. Click Create Link → Link Type Partner → Source Name Facebook Web.
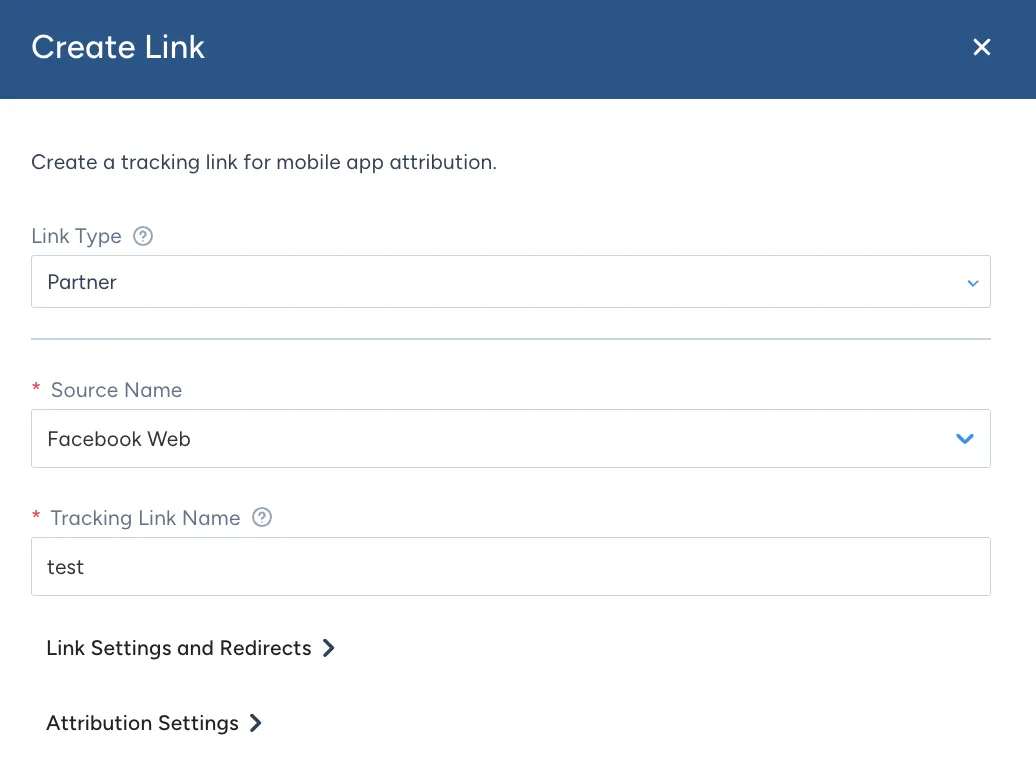
4. Continue through the step-by-step link creation.
5. Click Generate.
6. Copy the Click-through Tracking Link — you'll need it for the Meta ad in Step 10.
Part 2B — Adjust MMP Setup
Step 6 — Add Facebook Web Partner in Adjust
In Adjust, the partner-creation flow starts with the link itself; data-sharing credentials come in afterwards.
1. Go to Adjust → Partners.
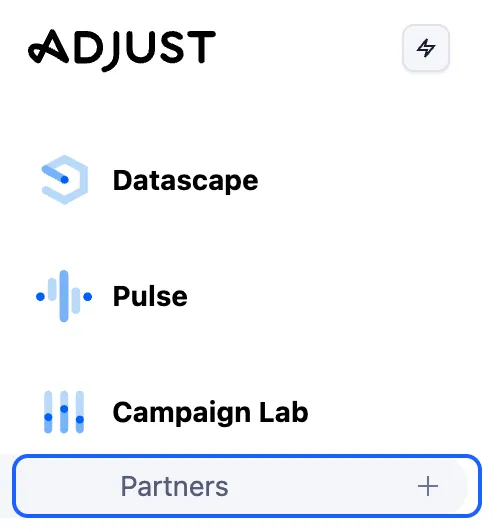
2. In the search bar, type facebook web and select the Facebook Web channel from results.
3. On the Facebook Web partner page, click + New link in the top-right.

Step 7 — Configure the Link
Set up the tracking link Adjust will use to attribute clicks back to Meta.
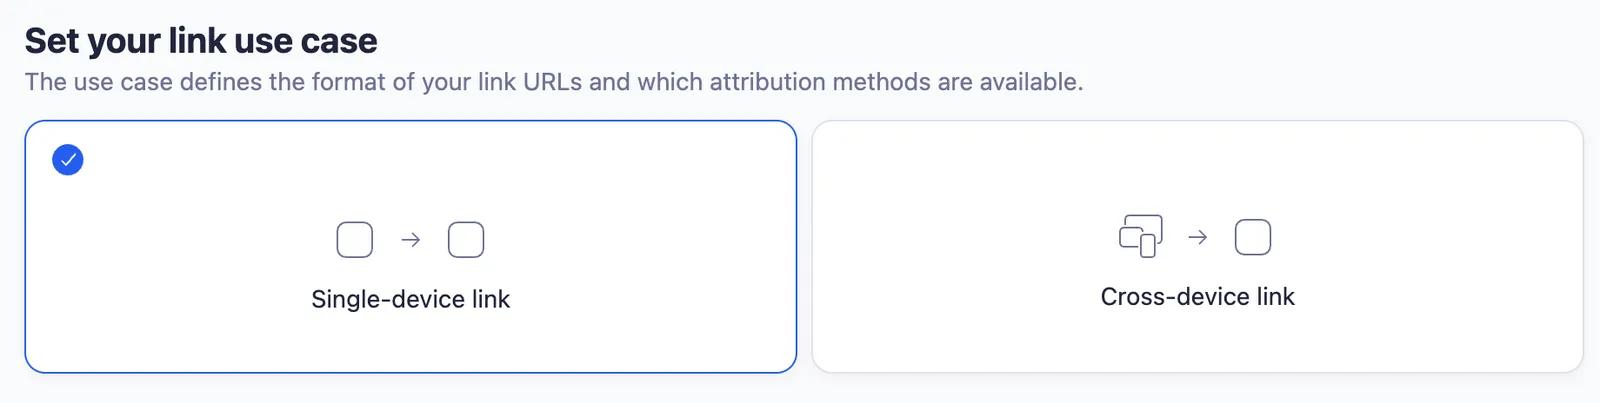
1. Under Set your link use case, select Single-device link (suitable for most W2A flows; pick Cross-device only if you specifically need it).
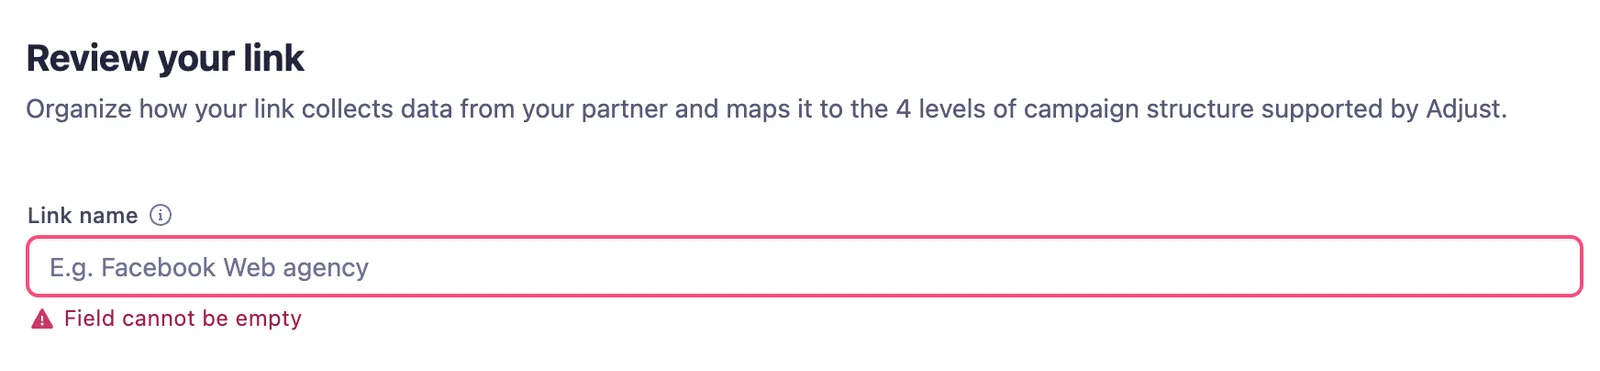
2. Under Review your link, set a clear Link name (e.g. Facebook Web).
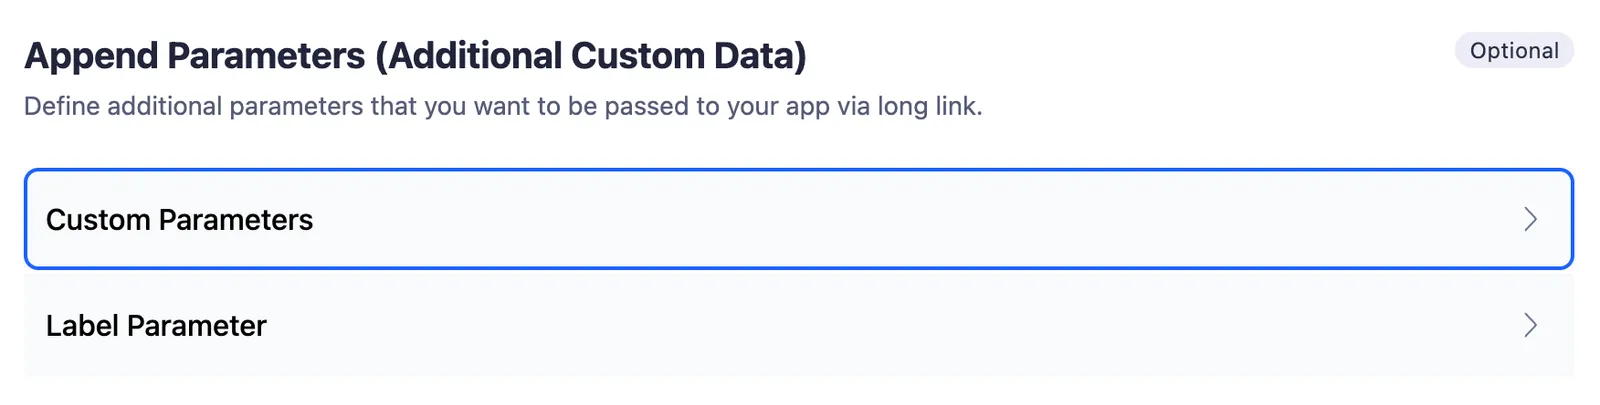
3. (Optional) Configure Deep link, Redirect, and Fallback if you want to route installed users to a specific app screen and handle uninstalled-app or unsupported-device fallbacks. App Store defaults work for most cases.
4. Move through the remaining steps (User destinations, Attribution settings, Setup review).
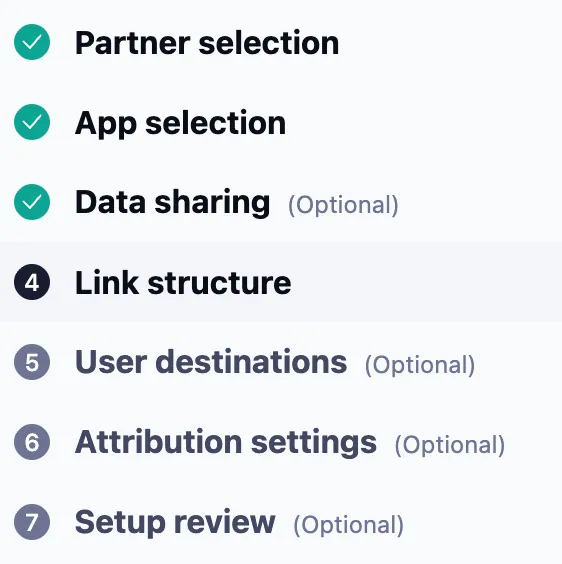
5. On the final review screen, click Create link.
Note: The link generated here is only half the setup. The next step adds the CAPI credentials that let Adjust forward events to Meta.
Step 8 — Enable Data Sharing (CAPI credentials)
This is where the Dataset ID and Access Token from Part 1 get pasted in.
1. Still on the Facebook Web partner page, switch from the Links tab to the Data sharing tab.
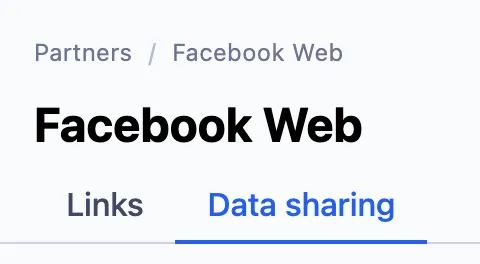
2. Click Enable data sharing for your platform (iOS / Android — repeat per platform as needed).
3. In the Enable data sharing dialog:
- Pixel ID → paste your Dataset ID from Step 5. (Adjust labels this field "Pixel ID" for legacy reasons — the Dataset ID is the correct value.)
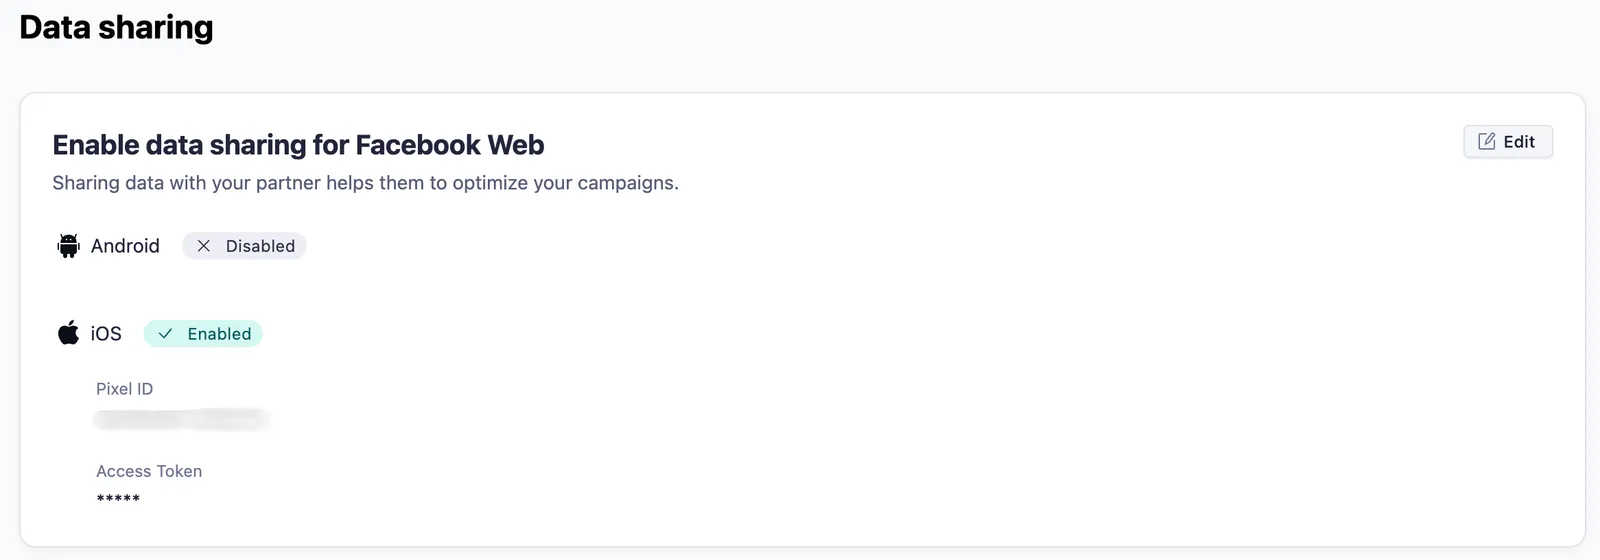
- Access Token → paste your CAPI Access Token from Step 5.
- (Optional) Set an Event Source URL and customise the Facebook Install Event Name if needed.
4. Click Save.
Once saved, return to the Links tab and open the link you created in Step 7. Under Link URLs, copy the Click URL (Branded domain) — this is the URL you'll paste into the Meta ad in Step 10.
Part 3 — Meta Campaign Creation
Step 8 — Campaign Level: Choose Sales Objective
With MMP setup finalized, you're ready to launch the W2A campaign in Meta Ads Manager.
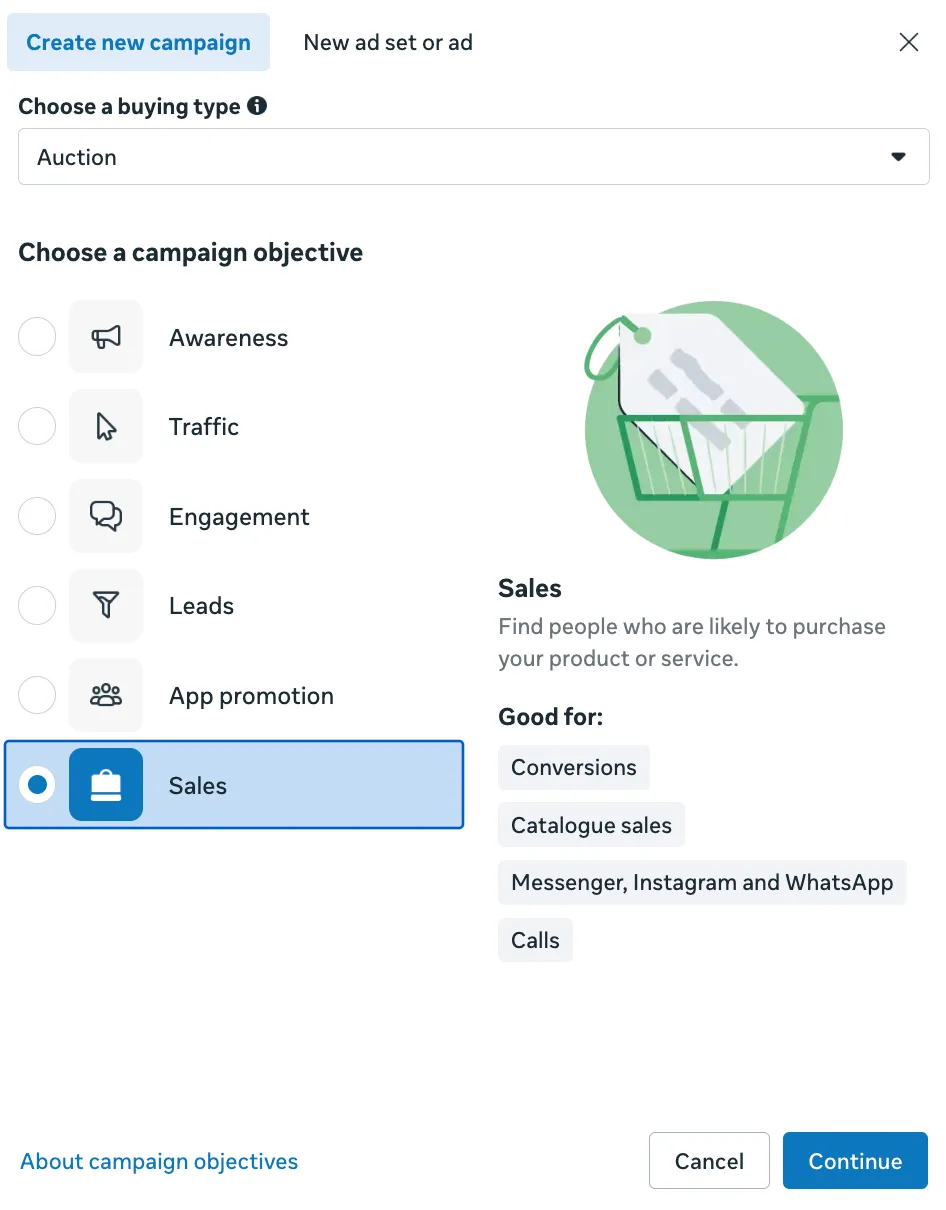
1. Create a new campaign.
2. Set Buying type to Auction.
3. Under Choose a campaign objective, select Sales.
4. Click Continue.
Step 9 — Ad-Set Level: Configure Conversion
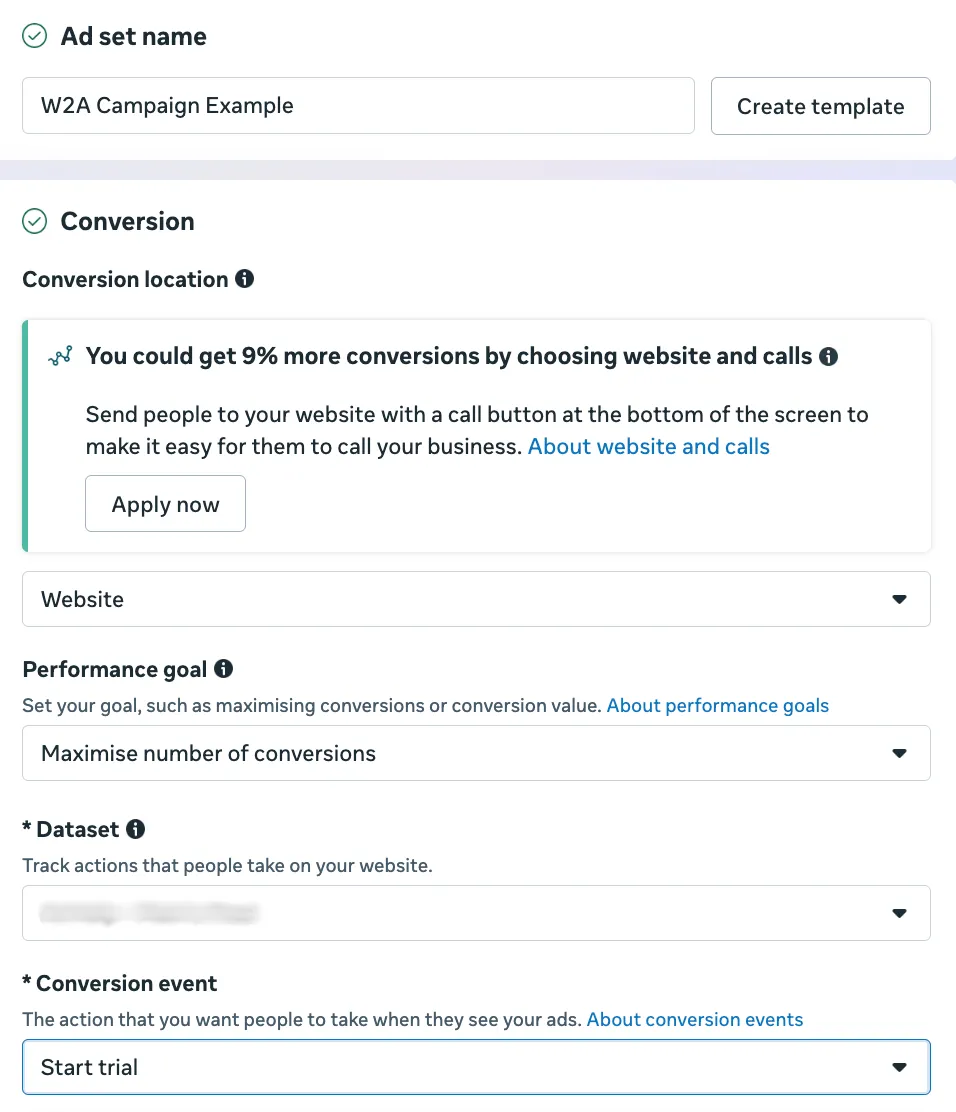
This is the critical step where most W2A setups go wrong — make sure you select the web dataset, not the mobile app one.
1. Name the ad set (e.g. W2A Campaign Example).
2. Under Conversion location, select Website.
3. Set Performance goal to Maximize number of conversions (or your preferred goal).
4. Under Dataset, select the Web Dataset you created in Step 1.
5. Under Conversion event, choose the event you want to optimize for (e.g. Start Trial, Purchase).
Critical: Two dropdowns trip everyone up here. Conversion location must be Website (not App). Dataset must be the Web Dataset you set up in Part 1 — Meta will also surface your mobile app dataset, and picking it kills the whole point of running a W2A flow. Double-check both before saving.
Step 10 — Ad Level: Set Destination URL
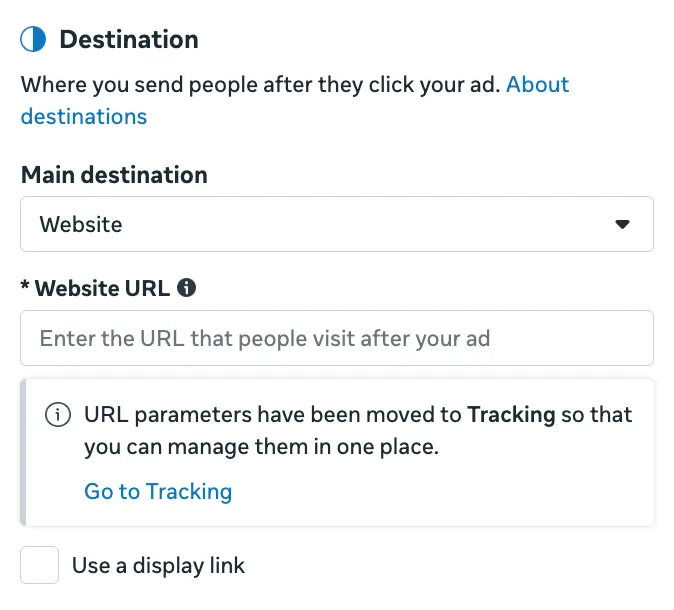
The final piece — pointing the ad at the MMP tracking link instead of a raw landing page.
1. Under Destination, leave Main destination set to Website.
2. In the Website URL field, paste the Click-through Tracking Link you copied from Singular in Step 7 (or the Click URL from Adjust in Step 8). This is what routes attribution back through the MMP.
Launch and Validate
Push the campaign live and confirm the full flow is working before scaling spend:
- Meta Events Manager → CAPI events should be landing on the Web Dataset within minutes.
- Singular or Adjust dashboard → clicks and downstream in-app events should attribute to the Facebook Web source.
- Meta Ads Manager → the conversion event you optimised for should start reporting against the campaign once volume picks up.
If any of the three layers go quiet, the break is usually at the handoff — either the MMP isn't receiving the click (tracking link issue) or Meta isn't receiving the event (token/dataset mismatch). Work backwards from whichever layer stopped.